There is a new option in the project template for including a webpack setup that I have begun using in my client projects. This option requires additional tooling to be installed, see the Webpack Prerequisites for notes on getting your environment setup. If you don't already know about our project template, please see the introduction.
What Do You Get with this option?
Hot Reloading
Our webpack setup can process javascript, typescript, css and .scss (SASS) into bundles, and during development we have hot module loading, which means that we can make changes in our files and just refresh the page to see the changes, the bundle updates happen in real time automatically while we work. When you build for production or use the publish command, it creates minified bundles and even creates pre-gzipped files for the js and css. The bundles are defined by entries in the webpack.config.js file and the generated bundles land in the wwwroot/dist folder. Since the files in that folder are generated, it is best to gitgnore the wwwroot/dist folder, you don't need them under source control.
A Ready to Customize Theme with bootstrap-sass
When you create a new project with this option the newly created site is set to use a theme named custom1, located under sitefiles/s1/themes/custom1
You will mainly want to customize the file: sitefiles/s1/themes/custom1/Shared/_Layout.cshtml, and the files in app-scss folder which are the sass files.
To see how you can edit the .scss (sass) files and see your changes in the browser, open the file app-scss/_variables.scss, and look for the variable "$navbar-inverse-bg"
With the site running you can change the color of that variable and refresh the page and see the top navigation bar color change.
Ultimately SASS gets compiled into CSS in the bundles, but gives you variables and mixins and other powerful tools to help you design your theme with less hard coding. By using variables you can keep the colors and fonts and other things that you want to change in one place to make it easier to make changes. You can also leave out parts of bootsrap css if you are not using them by commenting out items in the _boot.scss file. For example we commented out glyphicons because our setup uses font-awesome. You will notice the _font-awesome.scss file. Note that it does not contain all the font-awesome icons, it only has a subset, but you can add any missing ones if you need them, and possibly could also prune out a few that we included.
In the app-vendor folder you will find boot.js where you can comment out parts of bootstrap javascript if you are not using them.
This article will explain how to use Webpack along with bootstrap-sass to build custom bootstrap themes for cloudscribe. The webpack setup will also enable you to build client side applications using typescript with webpack automatically compiling the typescript into javascript bundles and using hot module loading during development so you can make changes to your client side code as well as to the sass files and just refresh the page to see your changes.
The _Layout.cshtml file already has links to the generated bundles for the app-scss and app-vendor folders as those are the main files for site style.
Sample Apps
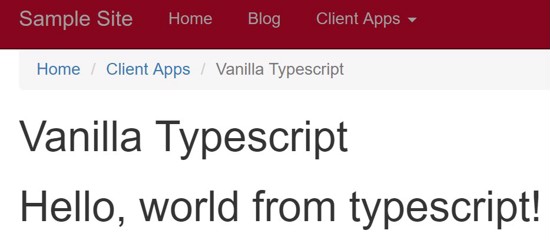
Vanilla Typescript Sample
There is a folder app-vanilla which has a single typescript file with a hello world app. To use it you just need a page with this:
<div id="greeter"></div>
<script src="/dist/vanilla.bundle.js"></script>
You can do that in a view or in a SimpleContent Page if you included SimpleContent in your project. In SimpleContent you can disable the CKeditor on individual pages in the page settings and you need to do that because CKeditor won't let you add just an empty div. You can add the script to the page using the Developer Tools button after you create a page. Here is a screenshot where I have added it in a SimpleContent page.
React/Redux Sample
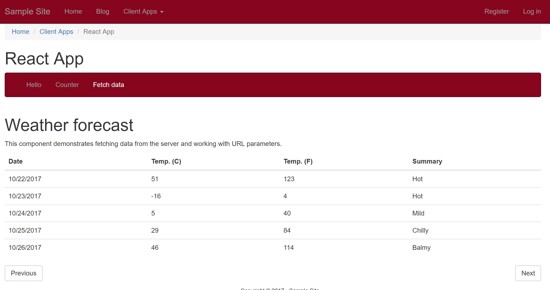
If you chose to include the sample react/redux app, there will be a folder named app-react. To use it you just need a page with this:
<div id="react-app">Loading...</div>
<script src="/dist/app-react.bundle.js"></script>
It also needs this which we already have in the head element of the _Layout.cshtml file:
<base href="@Context.Request.Path" />
You can add the div and the script in a view or in a SimpleContent page if you included SimpleContent in your project. In SimpleContent you can disable the CKeditor on individual pages in the page settings and you need to do that because CKeditor won't let you add an empty div. You can add the script to the page using the Developer Tools button after you create a page. Here is a screen shot where I have added it in a SimpleCotnent page:
I made a youtube video to demonstrate.


